
Photo Cake Wrap Ideas: Reels, Framed Panels and Memory Cakes
Five ways to lay out an edible photo wrap round a cake, from a photo reel with captions to framed panels you pipe round, and how to choose photos that suit each one.
What a photo cake wrap is, and why it works
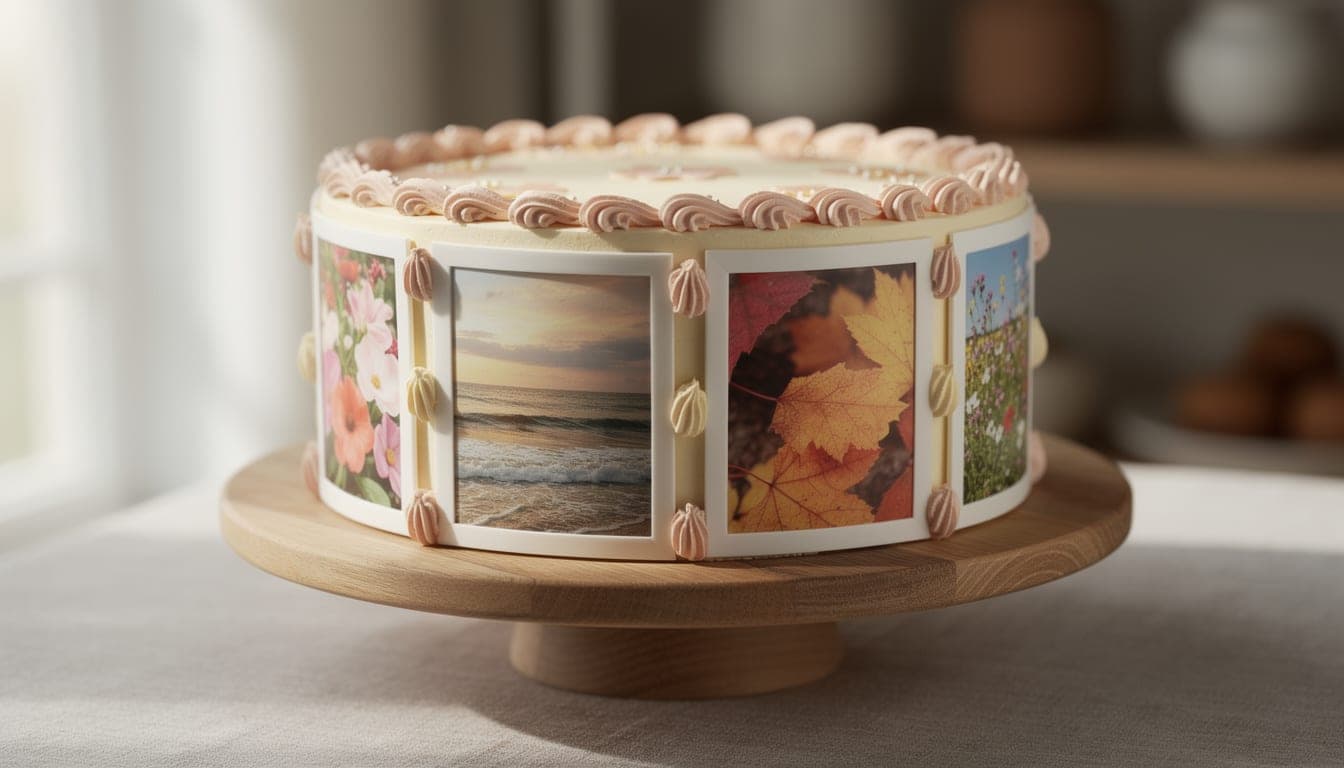
A photo cake wrap is a long, thin strip of printed edible paper that goes round the side of a cake. Most people think of a photo on the top. A wrap is different. Your photos travel round the cake like a film reel, so the cake looks good from every seat at the table.
The best photo cake wrap ideas come down to one decision: how do you lay the photos out along the strip? You can give each photo a white border and a caption, run the photos edge to edge, or leave gaps and pipe a frame round each one. Each layout suits a different cake and a different baker. This guide walks through them, with the choices we would make for each.
The wrap is printed on an icing sheet (frosting sheet), not wafer paper, so it melds into the buttercream. If you are not sure which to buy, see icing sheets vs wafer paper.
Five photo cake wrap layouts
1. The photo reel
Each photo gets a white border, like a developed print, with an optional caption underneath. It is the layout most people picture when they ask for a photo cake wrap, and it works well for a birthday “through the years” or an anniversary, where the captions can carry a date or a single word.
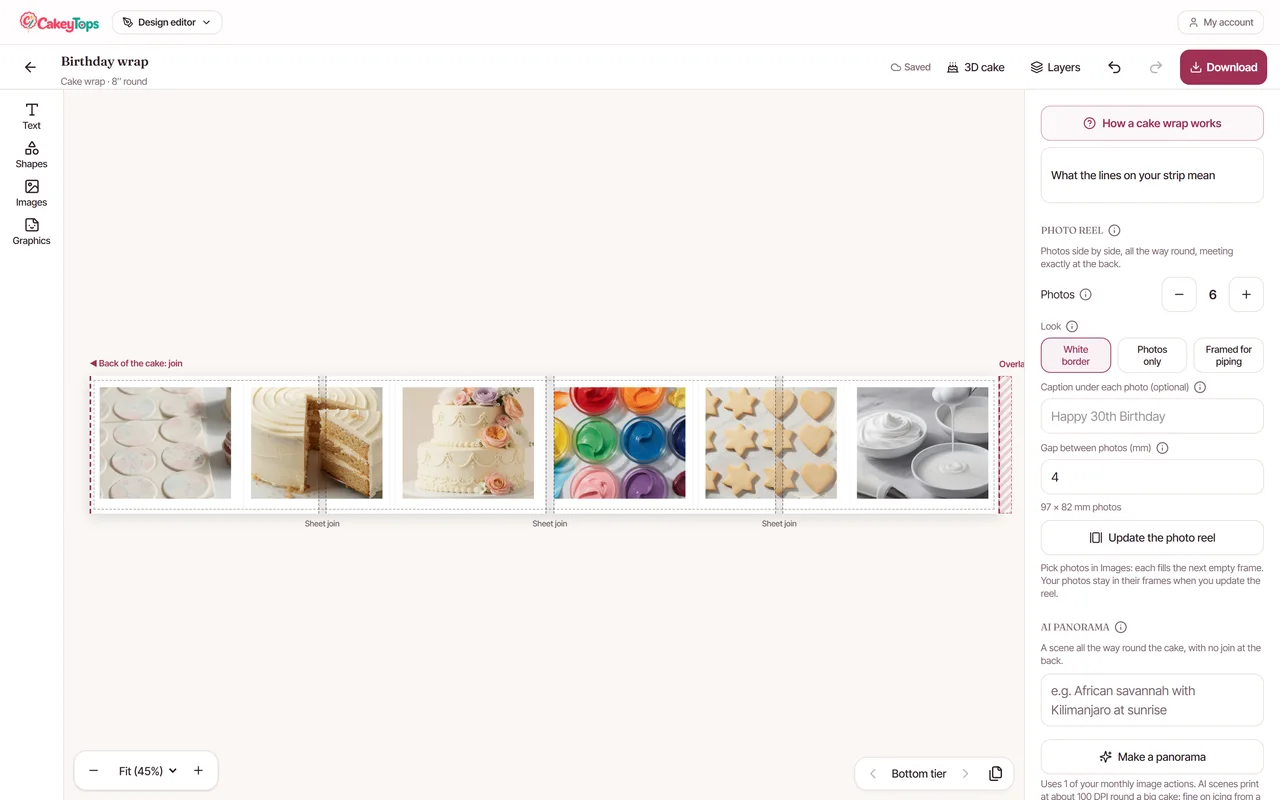
The white border is doing quiet work. It separates photos with very different colours, and it gives each picture a clean edge, so a slightly crooked placement is less obvious than on a bare edge.
2. The photo strip
The photos run edge to edge with no borders, so the whole wrap reads as one continuous picture. This suits a set of photos from the same day, or landscape shots that already flow into each other. Because there is nothing to separate the photos, it shows up differences in brightness and colour more than a reel does, so choose a matching set.
3. Framed panels for piping
This is our favourite for a baker who pipes. The photos are spaced out with gaps of 12 mm between them, and 8 mm above and below, leaving room to pipe buttercream round each one. Rosettes, a shell border or a simple bead round each photo all work.
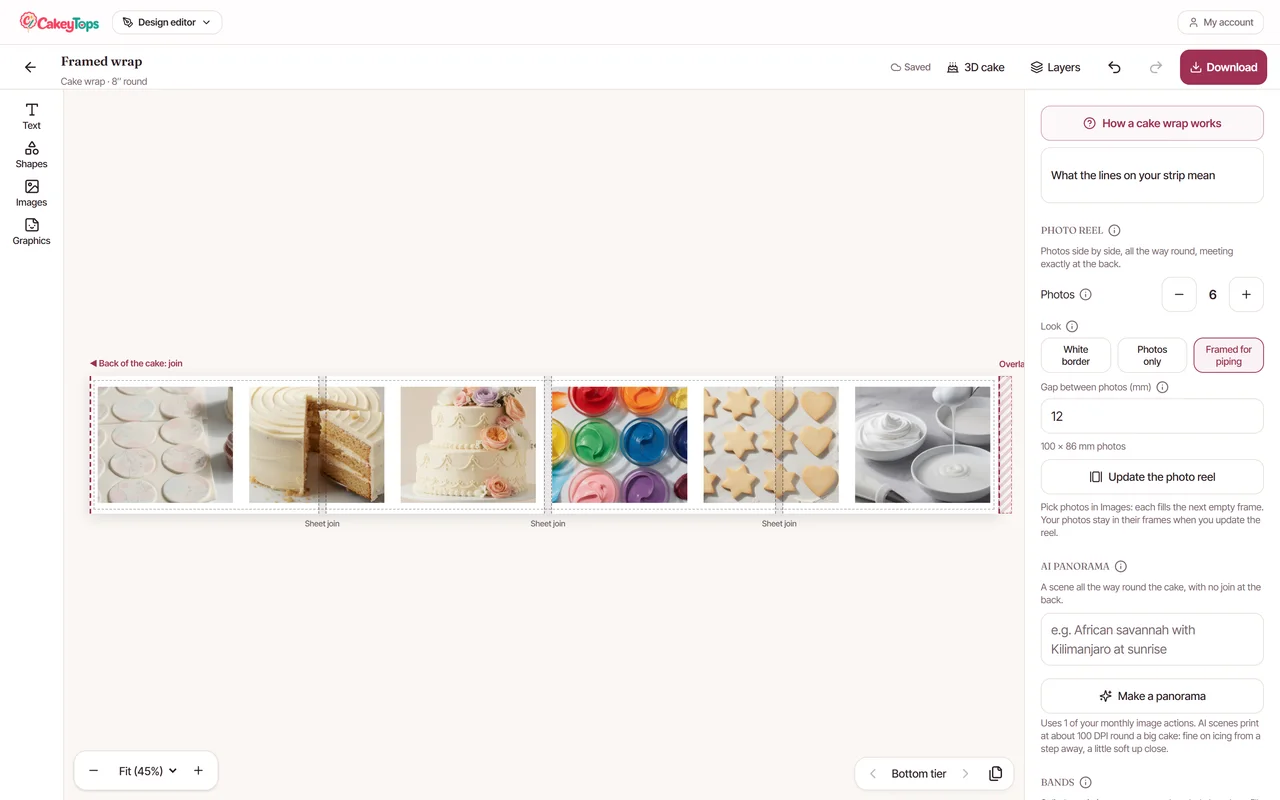
Piping also hides the joins. A wrap for a bigger cake is printed in pieces that overlap slightly, and a line of buttercream over a join is much kinder than trying to make two edges meet perfectly. What we found on our own test cake was that piped rosettes over each join and round the top and bottom edges made the whole thing look intended.
4. A repeating pattern or one scene all the way round
Not every wrap needs photos of people. A pattern that repeats all the way round, or a single scene such as a skyline, a garden or a beach, can run from one end of the strip to the other. A seamless repeat is forgiving because there is no obvious place where the design starts and stops. It is also a good route when you do not have enough good photos, or when you do not want faces on the cake.
5. Bands up the height
On a tall cake, you can stack the design in bands rather than one row: a band of photos, a band of colour, a band of text. The wrap is then a single piece of artwork that covers more of the side, instead of a thin ribbon in the middle. It is a good fit for a tiered or tall celebration cake where a single row would look sparse.
| Layout | Best for | Watch out for |
|---|---|---|
| Photo reel | Birthdays, anniversaries, a story told in order | Needs photos that crop well; keep captions short |
| Photo strip | A matching set from one day or one trip | Shows up differences in brightness and colour |
| Framed panels | Bakers who pipe, and cakes that need joins hidden | You need time to pipe a border round each photo |
| Pattern or scene | Themes without people, or when you have few photos | Repeats need to line up where the ends meet |
| Bands up the height | Tall or tiered cakes | More artwork to prepare and more of the cake to cover |
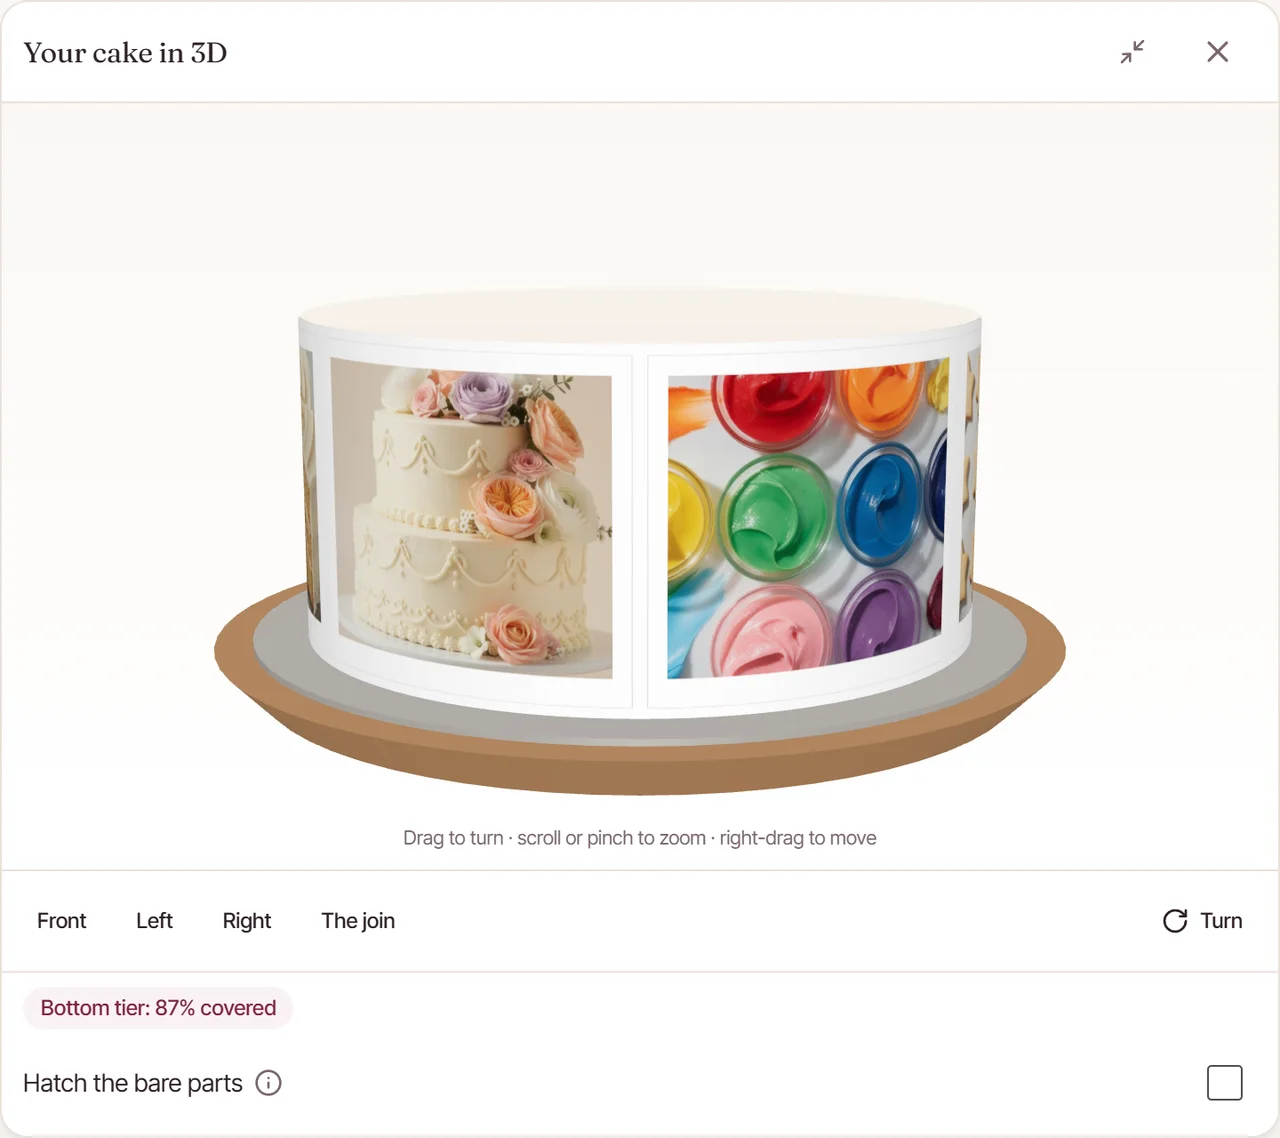
The designer also has an AI panorama option and a 3D preview that shows how much of the cake your design covers, which is useful for spotting a layout that looks fine flat but leaves the cake half bare.
How to choose photos for an edible photo wrap
An edible wrap is printed on a thin icing sheet, then pressed onto buttercream or fondant. It will not make a poor photo better. These are the checks we would make before sending anything to print.
- Choose sharp photos. A photo that looks slightly soft on a phone looks softer once printed on an icing sheet and wrapped round a curve.
- Choose well-lit photos. Dark photos can lose detail once printed, so pick the brighter shot when you have a choice.
- Match the brightness. A very bright beach photo next to a dim indoor one looks jarring in a strip. If you must mix them, a reel with white borders hides the difference better.
- Use portraits for a reel. Upright photos suit the tall frames of a reel, and faces fill them well. Wide landscapes suit a strip.
- Keep important faces away from the back join. The two ends of the wrap meet and overlap at the back of the cake. Put a face there and you risk a seam through someone’s nose.
- Think about the cake underneath. Light-coloured buttercream gives the truest colours. Rose Bakes suggests putting thin white fondant behind an image if the frosting is dark.
How many photos fit on a cake wrap
There is no single right number. It depends on the size of your cake, how tall you want the photos, and whether you use borders or gaps. The designer sizes the photos so that they meet neatly at the back, so you do not have to work out the spacing yourself.
If you want to know how long the wrap will be before you start choosing photos, use the free cake wrap size calculator. It works from your tin size and icing thickness, or from a tape measure round the finished cake. There are also pages for common sizes, such as the 6-inch, 8-inch and 10-inch round cake.
Not sure how to measure? How to measure a cake for an edible wrap explains why measuring the tin alone comes out short once the cake is iced.
Memory cake ideas that suit a photo wrap
A photo wrap is at its best when the photos tell a story. A few ideas that map onto the layouts above:
- Birthday through the years. A photo reel, in order, with the year or age as the caption. Start and end the story away from the back join.
- Anniversary. A reel from the first date to the latest holiday, with a single word under each photo.
- Retirement or leaving cake. Framed panels, with piped borders in the company or team colours.
- Graduation. A photo strip from the day itself, or a reel from nursery to cap and gown.
- Holiday or family memory cake. One scene all the way round, with a few small photos set into it.
- Memorial or remembrance cake. Simple and quiet works best: fewer photos, a plain background, and a short caption.
Once the layout is chosen, the practical steps are the same as any other wrap. Print at actual size, then see how to apply an edible wrap to a cake for the order to lay the pieces, and edible cake wrap problems if anything misbehaves.
Whose photos to use
For a customer order, ask them to send the photos themselves. It saves you hunting, and it means the pictures are theirs to share. It is also worth asking before you print a stranger in the background of a photo.
Lay out a photo reel, strip or framed panels round your cake, check it in 3D, then print it on A4 icing sheets. For CakeyTops members.
Frequently Asked Questions
What is a photo cake wrap?
It is a strip of printed icing sheet (frosting sheet) that goes round the side of a cake, with photos laid out along it. Popular layouts are a photo reel with white borders and captions, a photo strip edge to edge, and framed panels with gaps for piping.
What photos work best for an edible photo wrap?
Sharp, well-lit photos of similar brightness. Portrait photos suit a photo reel, and landscapes suit a strip. Keep important faces away from the back of the cake, where the ends of the wrap overlap.
How do I hide the joins on a photo cake wrap?
Use the framed panels layout and pipe buttercream round each photo, which also covers the joins. In the designer, joins are usually placed in the gaps between photos rather than through a face.
Can I put a cartoon character or celebrity on a cake wrap?
Generally you need the rights holder’s permission to print characters, logos or celebrities. Use your own photos, the customer’s photos or original designs. This is not legal advice.
How do I know how long my wrap needs to be?
Use the free cake wrap size calculator at /tools/cake-wrap-calculator. The length depends on the tin size and how thick the icing is, so a measurement round the iced cake is the most reliable.
Use the tool from this guide
Open the relevant CakeyTops tool and put the advice above to work straight away.
Keep reading
How to Measure a Cake for an Edible Wrap (Tin or Tape Measure)
Why “diameter × 3.14” leaves an edible wrap short, and two reliable ways to measure the iced cake instead, with round and square examples.
TutorialHow to Print an Edible Cake Wrap on A4 Icing Sheets
A cake wrap is longer than any sheet, so it prints in pieces. Here is how the pieces overlap, where the joins go, and the print settings that stop a wrap coming out the wrong size.
TutorialHow to Put an Edible Wrap Round the Side of a Cake
A step-by-step guide to wrapping an icing sheet round a cake, from chilled buttercream or fondant to hiding the joins under piping.